
The tab displays fulfilled notifications.

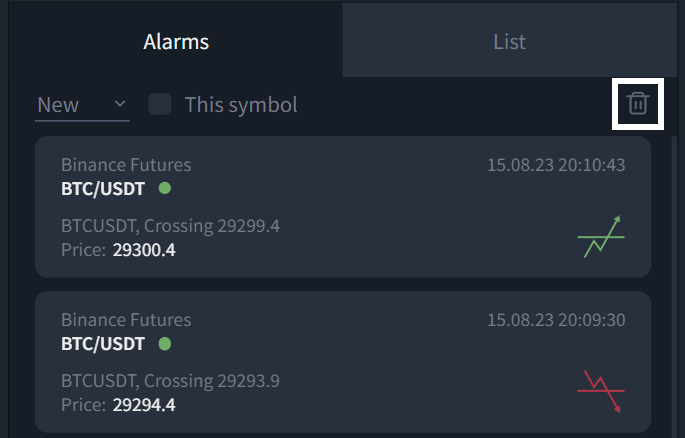
Contains a "trash can" indicator at the top right - pressing it deletes all DISPLAYED alarms in the list:

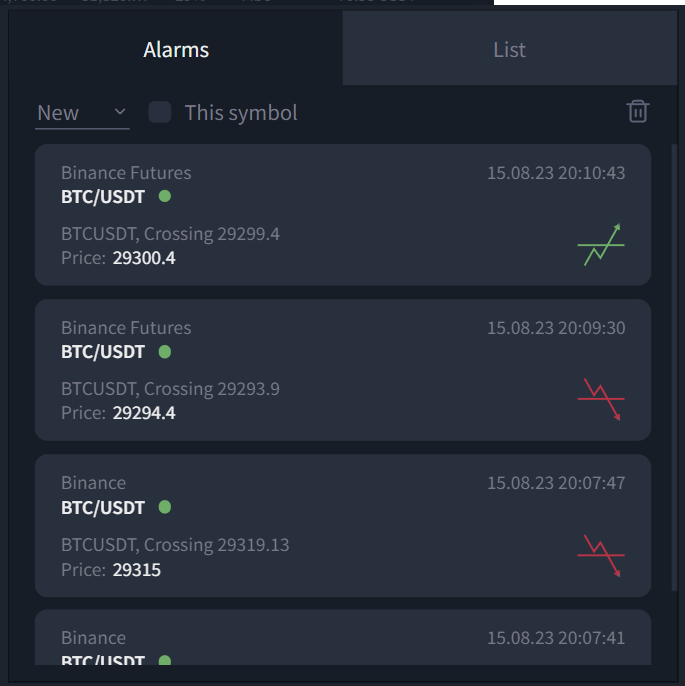
There are two checkboxes that control the list of alarms:

1. This symbol:
- When the checkbox is inactive, all created alarms on all symbols and exchanges are in the list; clicking the "trash can" indicator deletes all alarms, but not more than 50 at a time.
- When the checkbox is active, only alarms for the active trading symbol are in the list; clicking the "trash can" indicator deletes all alarms for the current active symbol, but not more than 50 at a time.
2. Active: When the checkbox is active, all deactivated alarms (highlighted with a red activation slider on the left side of the name) are hidden.
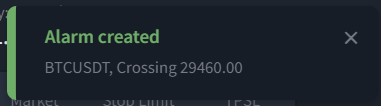
There are several ways to create an alarm:
- Basic:
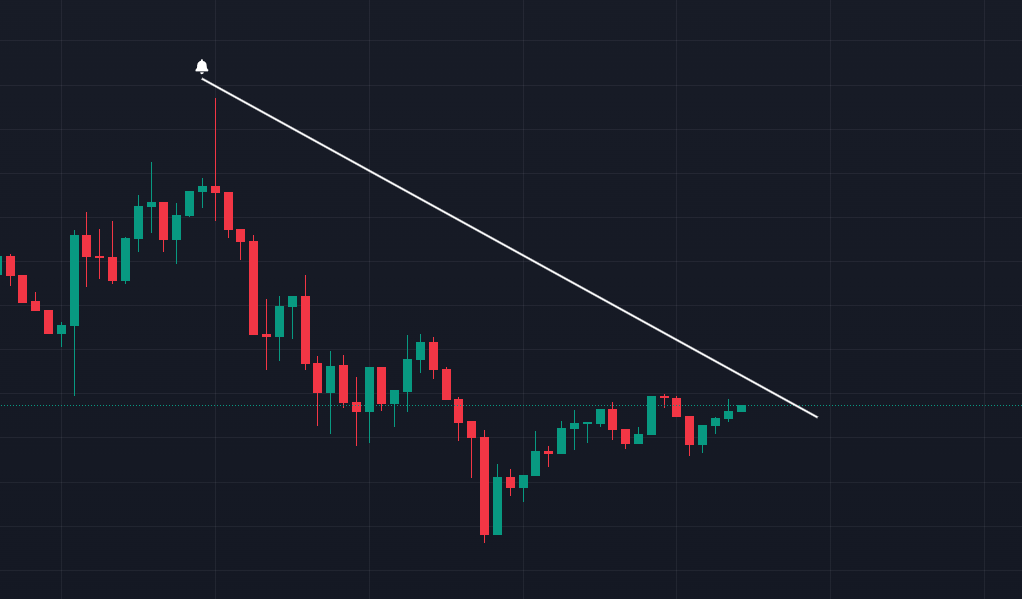
- Draw a trend line on the TV chart (Ray, Horizontal ray, Arrow, Line):

- On the top panel of the "Chart" block, click the "bell" icon labeled "Alarm". The action creates an alarm for the selected instrument, and adds it to the alarms list. An alarm also appears by right-clicking on the selected instrument or any empty space to open the context menu and selecting "Create alarm" or by using the keyboard shortcut ALT+A:

If the alarm is set to ‘Parallel Channel’ and ‘Rectangle’, the alarm will come twice:
First time when the price touches or enters the zone (upper or lower boundary)
The second time when leaving the zone (crossing either the upper or lower boundary).
- Fast:
- When hovering the cursor over the "Chart" block, on the right side along the vertical price column, a "plus" indicator appears. Hovering and clicking on it creates a "Horizontal Ray" tool with an alarm right at the current selected price:

Users have the option to quickly create alarms using either the "Horizontal Ray" or "Horizontal Line" tool. To effect this change, navigate to the "Settings" section, select "Interface" from the menu on the left, and then, within the "Strategies settings" submenu, switch the tool from "Ray" to "Line".:

Important! When creating a fast alarm using the "Horizontal Ray" tool, the starting point of its drawing is determined by the formula "coordinates of the last candle on the chart, minus 3 candles", on the selected Timeframe. When changing Timeframes downwards (for example from "1h" to "15m"), immediately after creating the alarm, the starting point of the "Horizontal Ray" tool may shift to the left. This is due to the peculiarities of the coordinate grid of the TradingView chart and is not an error.
Notification
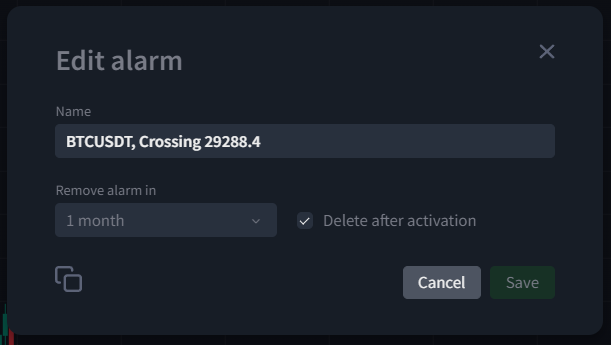
In the edit menu, you can set:
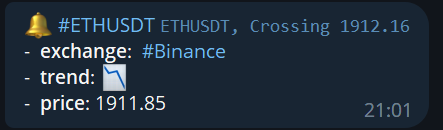
- "Name": The specified name appears in the list of alarms, in the pop-up modal window, and in the telegram bot's message when the price triggers alarm.
- "Remove alarm in": a "lifetime" of the alarm. After the specified duration, if no activation occurs, the alarm automatically disappears.
- "Delete after activation" checkbox: If checked, the alarm automatically disappears from the alarms list after it is triggered. Otherwise, the alarm remains in the list but become inactive (the slider to the right of the name changes position, turning red instead of green):

- "Copy Alarm Information" button: for copying alarm information (name, coordinates, id) to the clipboard.

- In the browser window with sound when the platform is open
- In the telegram bot:

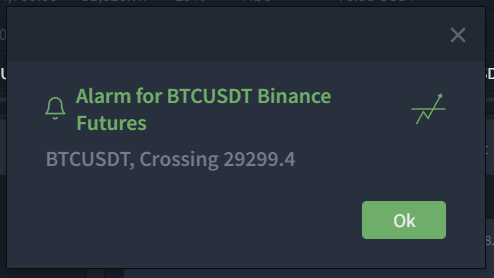
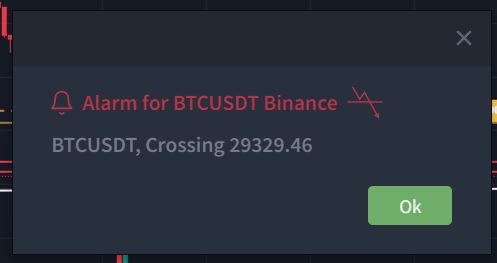
The configuration of alarms display on the platform can be done in the menu Settings > Interface > Notification Display Settings. This setting applies to all notifications. They can be shown as banners, modal windows, or not displayed at all. Even if the option "Do not display sound alarm" is selected, the sound of the alarm will still be played.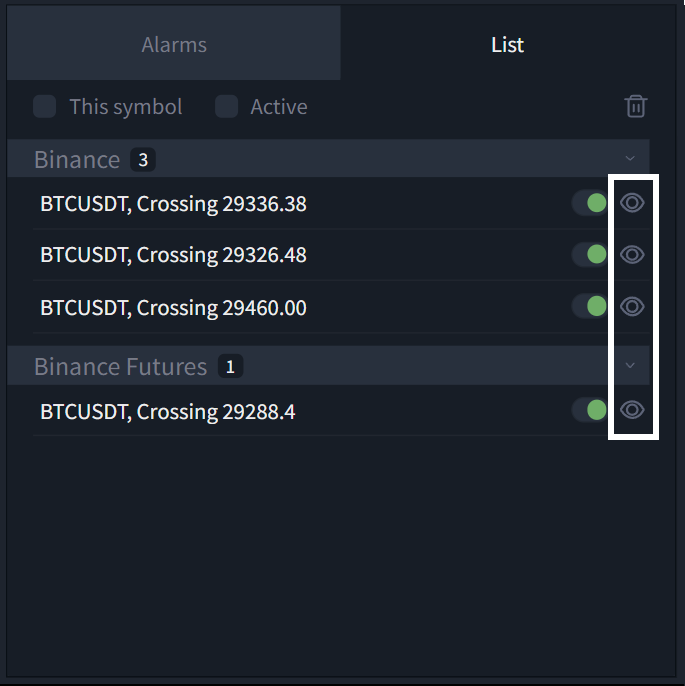
- Alarm notification can have a "new" status (green dot)
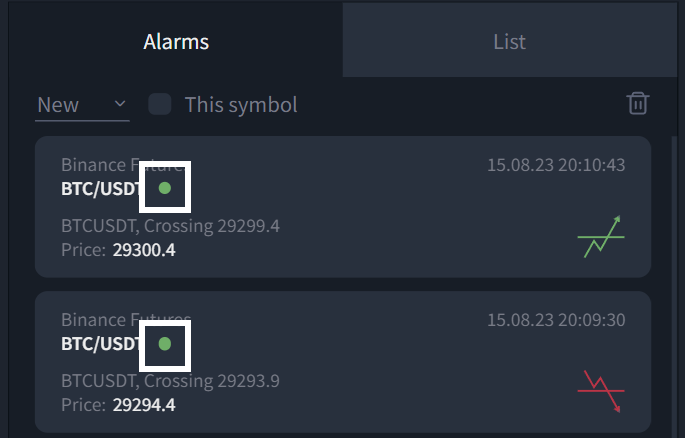
- All notifications initially have a "new" status. Users remove "new" status when get a notification in the tab and click "Ok".
- Users can also remove the "new" status by clicking on the notification itself in the list.
- When the list of notifications becomes too long, users can clear it by clicking the "trash can" icon:
4. There is a possibility to set an alarm on the indicator, but when the alarm is triggered, the notifications won't activate.
Was this article helpful?
That’s Great!
Thank you for your feedback
Sorry! We couldn't be helpful
Thank you for your feedback
Feedback sent
We appreciate your effort and will try to fix the article